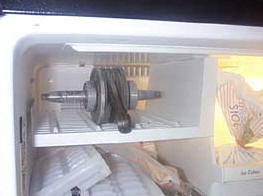
| The Rotax 185 is still a very popular engine primarily used to
power a portable high pressure pump used for forest fire fighting
,so all parts readily available. This page is going to deal with
replacing the crankshaft bearings and seals ,which is recommended
every 300 hrs as well as piston cleaning which can be as little as
30 hrs. They are quite easily done ,the key is using the right tools
for the job, plus there is a few very helpful tips that I learned
from a long time local Lazair pilot, that make the job that more
enjoyable.
This page contains many pictures they are not meant to be in any order,
some steps considered incidental are omitted, all have been edited
down to size to speed up the download.
Anyway I got most of the important and helpful procedures. On my
next rebuild I will fortify the picture collection.
|
| Disassembly procedure
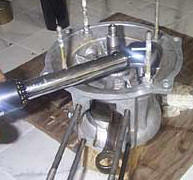
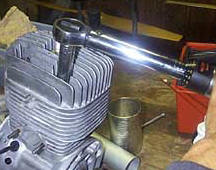
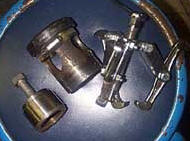 The
right tools for the job an assortment of pullers, from left to right,
Rotax copy, fly wheel puller custom made front bearing puller, but
available from Rotax (bearing positioned against crank flanges no room for
regular puller) typical bearing puller works for rear bearing. The
right tools for the job an assortment of pullers, from left to right,
Rotax copy, fly wheel puller custom made front bearing puller, but
available from Rotax (bearing positioned against crank flanges no room for
regular puller) typical bearing puller works for rear bearing.
|
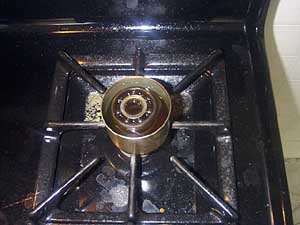
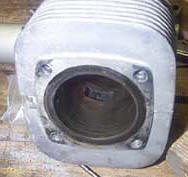 Inspect
and clean cylinder, remove carbon from exhaust port and inside
de-compressor ally. This job is made easier by soaking the whole
cylinder in carb cleaner, removes varnish and softens carbon Inspect
and clean cylinder, remove carbon from exhaust port and inside
de-compressor ally. This job is made easier by soaking the whole
cylinder in carb cleaner, removes varnish and softens carbon |
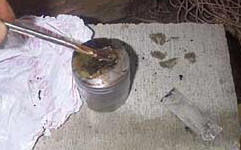 Here I am being a little cheap but it seems to work well with minor
build up, I am brushing on poly stripper paint remover, instead of soaking
the piston in stinky carb cleaner. Here I am being a little cheap but it seems to work well with minor
build up, I am brushing on poly stripper paint remover, instead of soaking
the piston in stinky carb cleaner.The stuff I used on my first engine
rebuild I'll tell you this stuff worked great dissolved even the most
stubborn carbon build up but the odour was permeable.
It would last for days
on your hands and on
your clothes,
the stuff was hardcore ,loads of warning labels. anyway one
of its ingredients, methylene chloride is also in poly stripper.
pic 2 once brushed on cover with plastic meth chloride is extremely
volatile and won't last if not covered
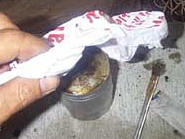
Wait several hours then scrape carbon off piston crown
(Note : try to leave the thin hard carbon film ,this apparently protects
the piston crown from heat) |
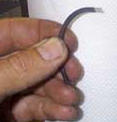
 To scrape carbon from the ring grooves ,make a tool from a old piston
ring you can see the shape that's been grinded on the end. To scrape carbon from the ring grooves ,make a tool from a old piston
ring you can see the shape that's been grinded on the end.
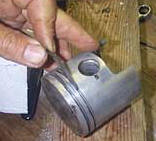
Carefully scrape away all traces of carbon in ring grooves ,this job
also easier if piston has been soaked overnight. |
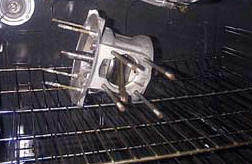 Now your wife will love this one. Now your wife will love this one.
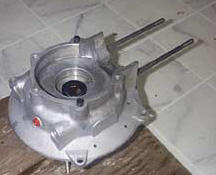
To dis-assemble crankcase insert in
oven heated to no more than 210 degrees F, wait till completely heated
then rap the case halves with a rubber mallet or a block of wood they
should fall apart with relative ease. |
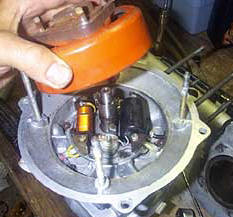
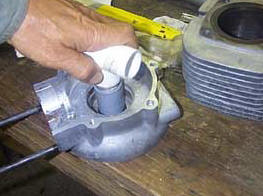 Here I am pushing in new oil seals, with a homemade 1" pvc tee and
socket tool works good for removing also. Here I am pushing in new oil seals, with a homemade 1" pvc tee and
socket tool works good for removing also.
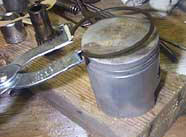
Now here's the fun part. The bearings are friction fitted to the crank,
here is a way you can put the new ones on without a press.
This works
slick, toss the crank in the deep freeze, put the bearings in a small pot
submerged in motor oil and heat till hot.
 When every thing is as hot and
cold as its going to be whip the crank out of the freezer, grab the
bearings with pliers
and slip them onto the cold shrunken ends IMPORTANT do not forget to
replace all the shims and spacers in there correct position When every thing is as hot and
cold as its going to be whip the crank out of the freezer, grab the
bearings with pliers
and slip them onto the cold shrunken ends IMPORTANT do not forget to
replace all the shims and spacers in there correct position |
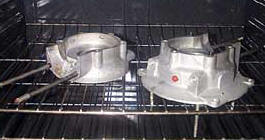 To re-assemble crankcase. Into the oven at 210'F goes the case halves. To re-assemble crankcase. Into the oven at 210'F goes the case halves.
|
 Back into the freezer goes the crankshaft with new bearings wait (be
patient) till they are up/down to temperatures Back into the freezer goes the crankshaft with new bearings wait (be
patient) till they are up/down to temperatures |
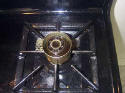
 When ready whip the back crankcase half out of the oven and place on a
block of wood, whip crank out of freezer and carefully and firmly press
crank assy into rear case. When ready whip the back crankcase half out of the oven and place on a
block of wood, whip crank out of freezer and carefully and firmly press
crank assy into rear case.
Make sure to put magneto end of crank into this
side! |
POSITION case gasket then quickly remove front case from oven
 and place
over crank and press down to bring halves together. and place
over crank and press down to bring halves together.
Notes you must me gentle at first to make sure bearings align with there
sockets in the cases to prevent jamming also check gasket placement.
Replace the 4 crankcase bolts and torque down to correct value, remember
to use cross sequential incremental torquing .
At this time you will usually find a little resistance when the crank is
turned over, This is normal before the anealing step. Put the unit back
into the oven to again bring all parts up to uniform temperature, remove
crankcase from oven then rap both ends of the case halves and bearing
housings with a 2X4 block or wooden mallet, this will settle the bearings
into there proper place. Recheck bolt torques when cooled . |
 Use ring expander to re-install piston rings, some say that you must use
new piston rings every time , I don't think its necessary myself
especially if I am de-carbonning every 50 hrs I'd probably replace them
after 200-300 hrs Use ring expander to re-install piston rings, some say that you must use
new piston rings every time , I don't think its necessary myself
especially if I am de-carbonning every 50 hrs I'd probably replace them
after 200-300 hrs |
 Install gaskets, cylinder and head
Torque to proper values Install gaskets, cylinder and head
Torque to proper values |
 Special Notes Special Notes
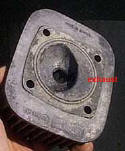
Cylinder head placement is important, you will notice that the top of the
combustion chamber has a defined shape, make sure that the shallow lobe
that assists the removal of exhaust gasses is placed over the exhaust port
side.
|
Also regarding the cylinder head gasket, myself and others I know re-use
it
 several times, as long as you replace it in the original position, I
have never had a failure and I put lots of hours on my engines. This is
especially handy for just routine combustion chamber cleaning and
inspection. several times, as long as you replace it in the original position, I
have never had a failure and I put lots of hours on my engines. This is
especially handy for just routine combustion chamber cleaning and
inspection. Reinstall magneto. If you did not put a
reference scribe mark on mag
and case you will have to reset timing using a dial gauge inserted into
the spark plug hole. Its a good Idea to fill all electrical connections
with silicone to exclude any moisture.
This is also a good opportunity to
check or replace the points. Courtesy of:
http://persweb.direct.ca/highland/lazair/engine/engine.html
|