|
My first attempt at painting was using Mike Fisher's latex method. It was my conclusion that this would not provide the level of finish that I wanted to see on my airplane.
In 1994 I built and finished a
Nieuport 11, (Graham Lee Design) and covered it in 1.6oz Stitts. I used a
combination of black latex primer to fill the weave of the fabric and
industrial polyurethane oil base paint for the finish. This experience
started my search for a better method. My goal was a serviceable finish
that would look good and avoid the need to spend the large amount of money
for the certified stuff!
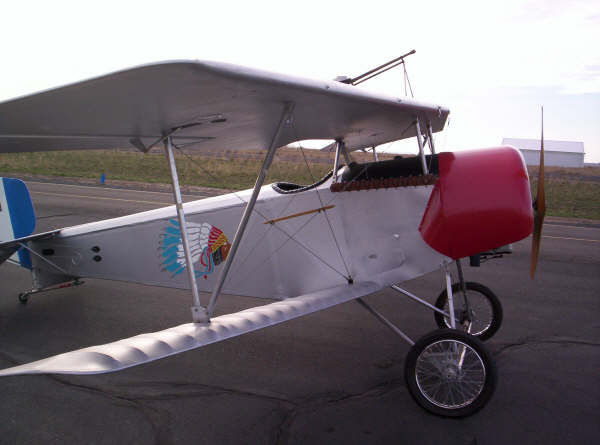
Here is what I have come up with and I might say it works well, looks
good with a nice gloss and is very easy on the pocket book. This finish
goes on easy, and the need for elaborate spray painting facilities is
eliminated.
STEP 1
Seal aircraft with wood sealer if it is a wooden airplane. There is no
need to finish an aluminum tube structure if it is not flown near salt
water. For the RagWing Special I am building I am using 2 brush coats of
MINWAX OUTDOOR CLEAR SHIELD POLYURETHANE WOOD SEALER. This material is
applied unthinned but brushed on in thin coats. I use satin finish so that
I may see better where I have brushed.
STEP 2
If you are using the STITS FABRIC (1.7oz) you can brush a thinned coat of
POLY-TAC cement over the fabric gluing points. Use your Stits manual for
further information on this. The cement can be thinned with MEK SOLVENT
and I used about 50/50 cement/thinner. Let this dry and then the fabric
can be applied and the cement under neath the fabric can be re activated
by brushing 50/50 cement through the fabric at these areas. After the
fabric has been applied and shrunk then the tapes that you're using for
reinforcement and or rib stitching/attachment can be applied using this
same glue combination. A little iron run along the rough spots will smooth
them and make sure that they are attached well. I use a Modelers Heat
Shrink Cover Iron for this process.
STEP 3
Clean the fabric with a clean cotton cloth and solution of MEK. Just
dampen the cloth and wipe the fabric with it. Remember that this stuff is
a strong solvent and is capable of melting the glue joints and dissolving
your Polyurethane wood sealer. If you just dampen the cleaning cloth and
wipe the surface of your covering job this will remove the sizing and
other contaminants on the fabric. If you do not do this the paint will not
adhere very well.
STEP 4
Using a Good Quality Tac Cloth wipe down the area to be painted BEFORE
EVERY STEP!STEP 5
Using EMPIRE POLYURETHANE LATEX PRIMER thinned with 30% FLOETROL LATEX
PAINT CONDITIONER and a 3" FOAM PAINT BRUSH, brush the primer into
the fabric using span wise strokes. This is the first coat so do not try
to fill the weave completely with this first coat. If you do you will have
runs inside the fabric and just in general make a big mess. Repeat this
process using cross coats until the fabric weave is filled. This will take
3 to 4 coats. Be sure to let the paint dry well before each application.
If you use nice even brush strokes there will be no need to sand before
final paint application. The FLOETROL will help the paint flow out into
the fabric and be self-leveling. It also adds flexibility to the paint.
Minor brush stokes are acceptable to me but you make you own decision
about sanding. Preparation is the key to a great final finish. No short
cuts here.
STEP 6
Using ENTERPRISE GLOSS POLYURETHANE OIL BASE ENAMEL and a 4" WIDE
1" DIAMETER WHITE FOAM PAINT ROLLER roll the first coat of finish
color onto the fabric. The finish will be much smoother if you put the
paint on a smooth surface to apply it to the roller. I used wax paper
taped to a smooth surface. Remember that you are not trying to apply the
complete finish coat in one step. Roll the paint out to a nice even coat
and when the paint begins to tack stop rolling. The urethane paint will
self level as it begins to cure. All you are doing here is to apply the
paint evenly and get most of the air bubbles out of the finish color. Time
between coats will be about 24 hours depending on humidity. The finish
color will take 2 to 3 coats depending upon the color you choose. You
should have a very glossy finish.
STEP 7
After the paint has cured for at least a week, clean the painted surface
and wipe on a coat of SON OF A GUN PROTECTANT or similar to protect the
paint and give the surface some UV protection. I clean my paint job often
and keep a coat of this protectant on at all times.
The paint samples that I have done over the years have spent their
entire time out door in all kinds of weather in the state of Indiana. This
system seems to hold up well and still look good after all of this abuse.
Please do your own samples and satisfy your self as to your technique and
results. Best of luck and happy aviating.
For further information contact Jerry
Bunner
| LIST OF MATERIALS |
| WOOD SEALER |
MINWAX CLEAR SHIELD POLYURETHANE WOOD SEALER |
| LATEX PRIMER |
ENTERPRISE BRAND LATEX PRIMER IN WHITE |
| LATEX CONDITIONER |
FLOETROL BRAND LATEX PAINT CONDITIONER |
| FINAL COLOR |
ENTERPRISE BRAND POLYURETHANE OIL BASED ENAMEL |
| SOLVENT |
MEK |
| ROLLER |
4X1" WHITE FOAM PAINT ROLLERS |
|